In this article we would like to share our experience on enabling Goggle SignIn for android apps. Some parts of will be applicable for IOS as well but we haven’t tried that
Create a simple app with Google Sign-In button 🔗
Start by creating a new app, which will generate a flutter project with default template of counter example
flutter create gsignin_simple
Let us add two buttons one for sign-In and other for Logout, replace template code in lib/main.dart with below code
class MyHomePage extends StatelessWidget {
  MyHomePage({super.key});
  @override
  Widget build(BuildContext context) {
    return Center(
        child: Column(
      mainAxisAlignment: MainAxisAlignment.center,
      children: [
        ElevatedButton(
          onPressed: () {
            print("Signin button is clicked");
          },
          child: Text("SignIn with Google"),
        ),
        ElevatedButton(
            onPressed: () {
               print("Logout button is clicked");
            },
            child: Text("Logout"))
      ],
    ));
  }
}
Update Android package name. 🔗
To make Google sign-in to work android apps, it expects apps to be standart package name com.domainname.appname. We could have set this name to proper one during project creation itself like below,
flutter create --org com.tinisoft gsignin_simple
Note: here googlesignin is appname and tinisoft is our domain. You could replace it however you want
For already existing apps we can use change_app_package_name tool to change the android package name, So add it as dev dependancy part of pubspec.yaml and run flutter pub get
dev_dependencies:
  change_app_package_name: ^1.1.0
After the package is installed you could change package name as below
flutter pub run change_app_package_name:main com.tinisoft.gsignin_simple
Note: change_app_package_name is added only in dev_dependencies not in dependencisel. More here All set, now we are good to register our application in Google firebase
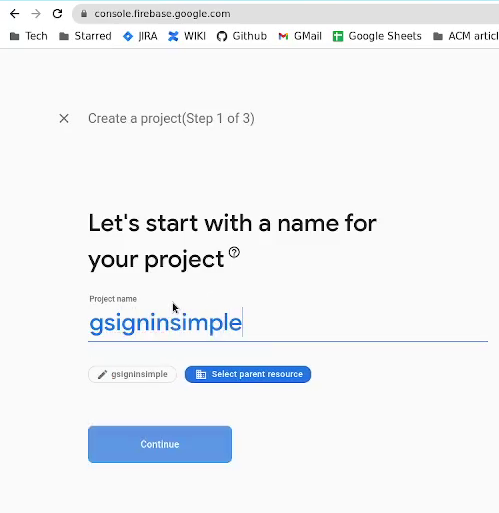
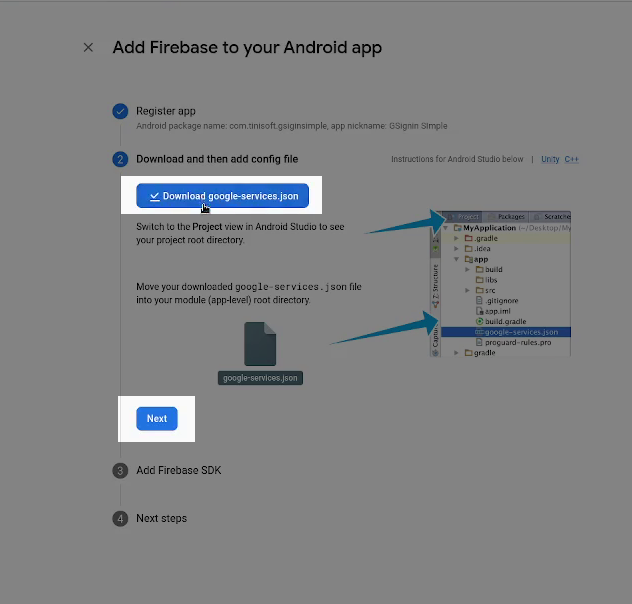
Register app in Firebase 🔗
Open firebase console in the browser firebase console login with your google credentials

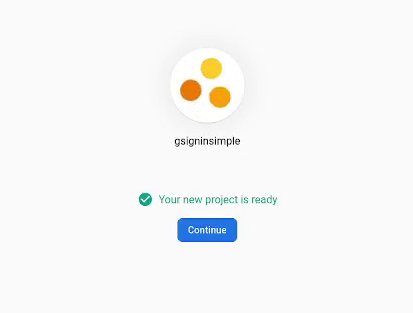
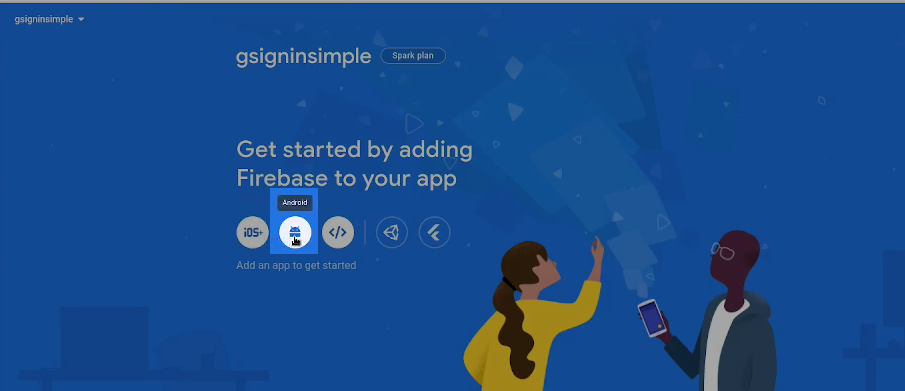
Now our firebase app is ready, we can register Android application, let us start that by clicking our android icon
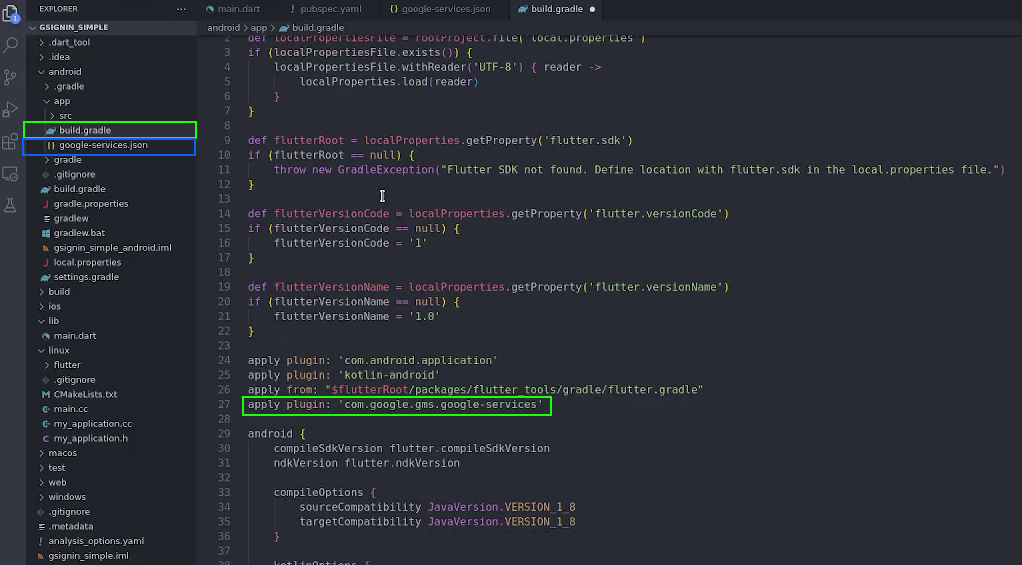
Copy the google-services.json file to root of android directory under flutter project,
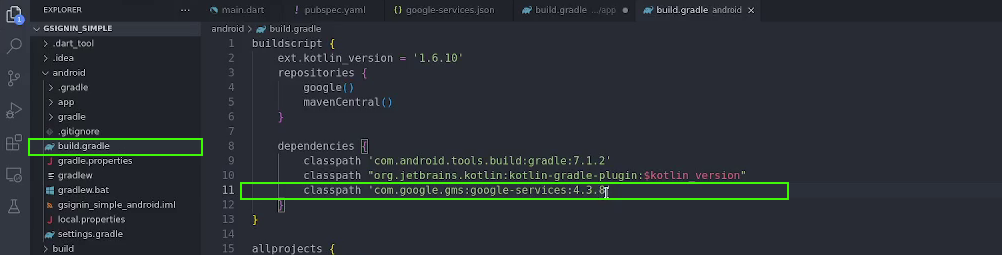
Install google_sign_in, which we will be using shortly to fetch authentication token Google. For this to be running properly with Android we are expected to add some java classes manully to our android app, you can follow the instruction on below github comment https://github.com/flutter/flutter/issues/12140#issuecomment-348720774 except the google-services version is different use 4.3.8 instead.
classpath 'com.google.gms:google-services:4.3.8'
For getting developer registry key. 🔗
From the flutter project run the below,
cd android
./gradlew signinReport
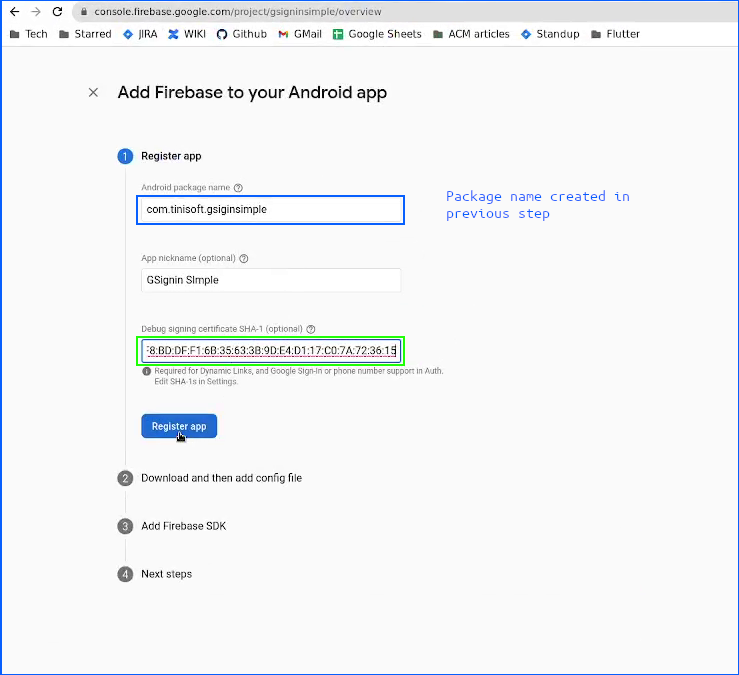
You will be dumped with large set of intformation, but only thing we are bothered is SHA1 key under debug Variant.
> Task :app:signingReport
Variant: debug
Config: debug
Store: /home/ark/.android/debug.keystore
Alias: AndroidDebugKey
MD5: --:--:--:--:--:--:--:--:--:--:--:--:--:--:--:--
>>>>>>>> This sha1 Key is to be copied.
SHA1: --:--:--:--:--:--:--:--:--:--:--:--:--:--:--:--:--:--:--:--
<<<<<<<<<
SHA-256: --:--:--:--:--:--:--:--:--:--:--:--:--:--:--:--:--:--:--:--:--:---:
Valid until: Tuesday, September 17, 2052
----- Removed for breivity -------------------------------------------------

BUILD SUCCESSFUL in 4s
4 actionable tasks: 4 executed
Add on click event handle SignIn. 🔗
Now all set!!! Let’s get on to the actual code, that is pretty simple, first you have to initialise a google sign in object and hook onPressed events of SignIn and Logout buttons.
class MyHomePage extends StatelessWidget {
  MyHomePage({super.key});
   final _googleSignIn = GoogleSignIn(
    scopes: [
      'email',
      'https://www.googleapis.com/auth/userinfo.profile',
    ],
  );
  @override
  Widget build(BuildContext context) {
    return Center(
        child: Column(
      mainAxisAlignment: MainAxisAlignment.center,
      children: [
        ElevatedButton(
           onPressed: () async {
            print("Google SignIn clicked\n");
            try {
              var account = await _googleSignIn.signIn();
              debugPrint("account received is $account");
              if (account != null) {
                var auth = await account.authentication;
                debugPrint("auth is $auth");
                debugPrint("auth is ${auth.idToken}");
              }
            } catch (error) {
              debugPrint('$error');
            }
          },
          child: Text("SignIn with Google"),
        ),
        ElevatedButton(
            onPressed: () {
              _googleSignIn.signOut();
            },
            child: Text("Logout"))
      ],
    ));
  }
}
Plugin exception 🔗
If you received the following exception during your run,
flutter (13835): PlatformException(sign_in_failed, com.google.android.gms.common.api.ApiException: 12500: , null, null)
you have to add support mail for firebase console application, this video will help you on that .