This time we will learn basics of containers by building go webapp, deployed in docker.
How to containerize your Webapp written in Go with Docker. 🔗
Introduction @ History 🔗
You can skip this section go to howto if you get bored by history. Let us get introduced to Docker / Containers in General. Always knowing understanding why something was created helps to make sense of why things are designed in the way they are and problems they address.
- Isolation: Before containers came along, assume there is a cloud provider who provides web app hosting services to customers. Cloud provider has to isolate one customer services from other customers to ensure security, privacy and guarantee of resources. Initially this was done by providing separate servers for each customer, that way to no customers share same machine. But this was not effective way of doing it, because just to run small service that takes 100MB, you might to have reserve entire Intel Xenon Server with 16GB RAM.
Virtualization provided was the earlier answer to these problems, where you have multiple VMs hosted in a single physical server. Providing all the security, privacy and guarantee of resources, more cost effective. But there are cases where individual services of same customers itself needed the Isolation property, that case we need to use per VM per service. When you think about it has lot of overhead to it, each VM has to have OS, cost of virtualization itself. (Note: These days very lightweight VMs are available look at https://firecracker-microvm.github.io/)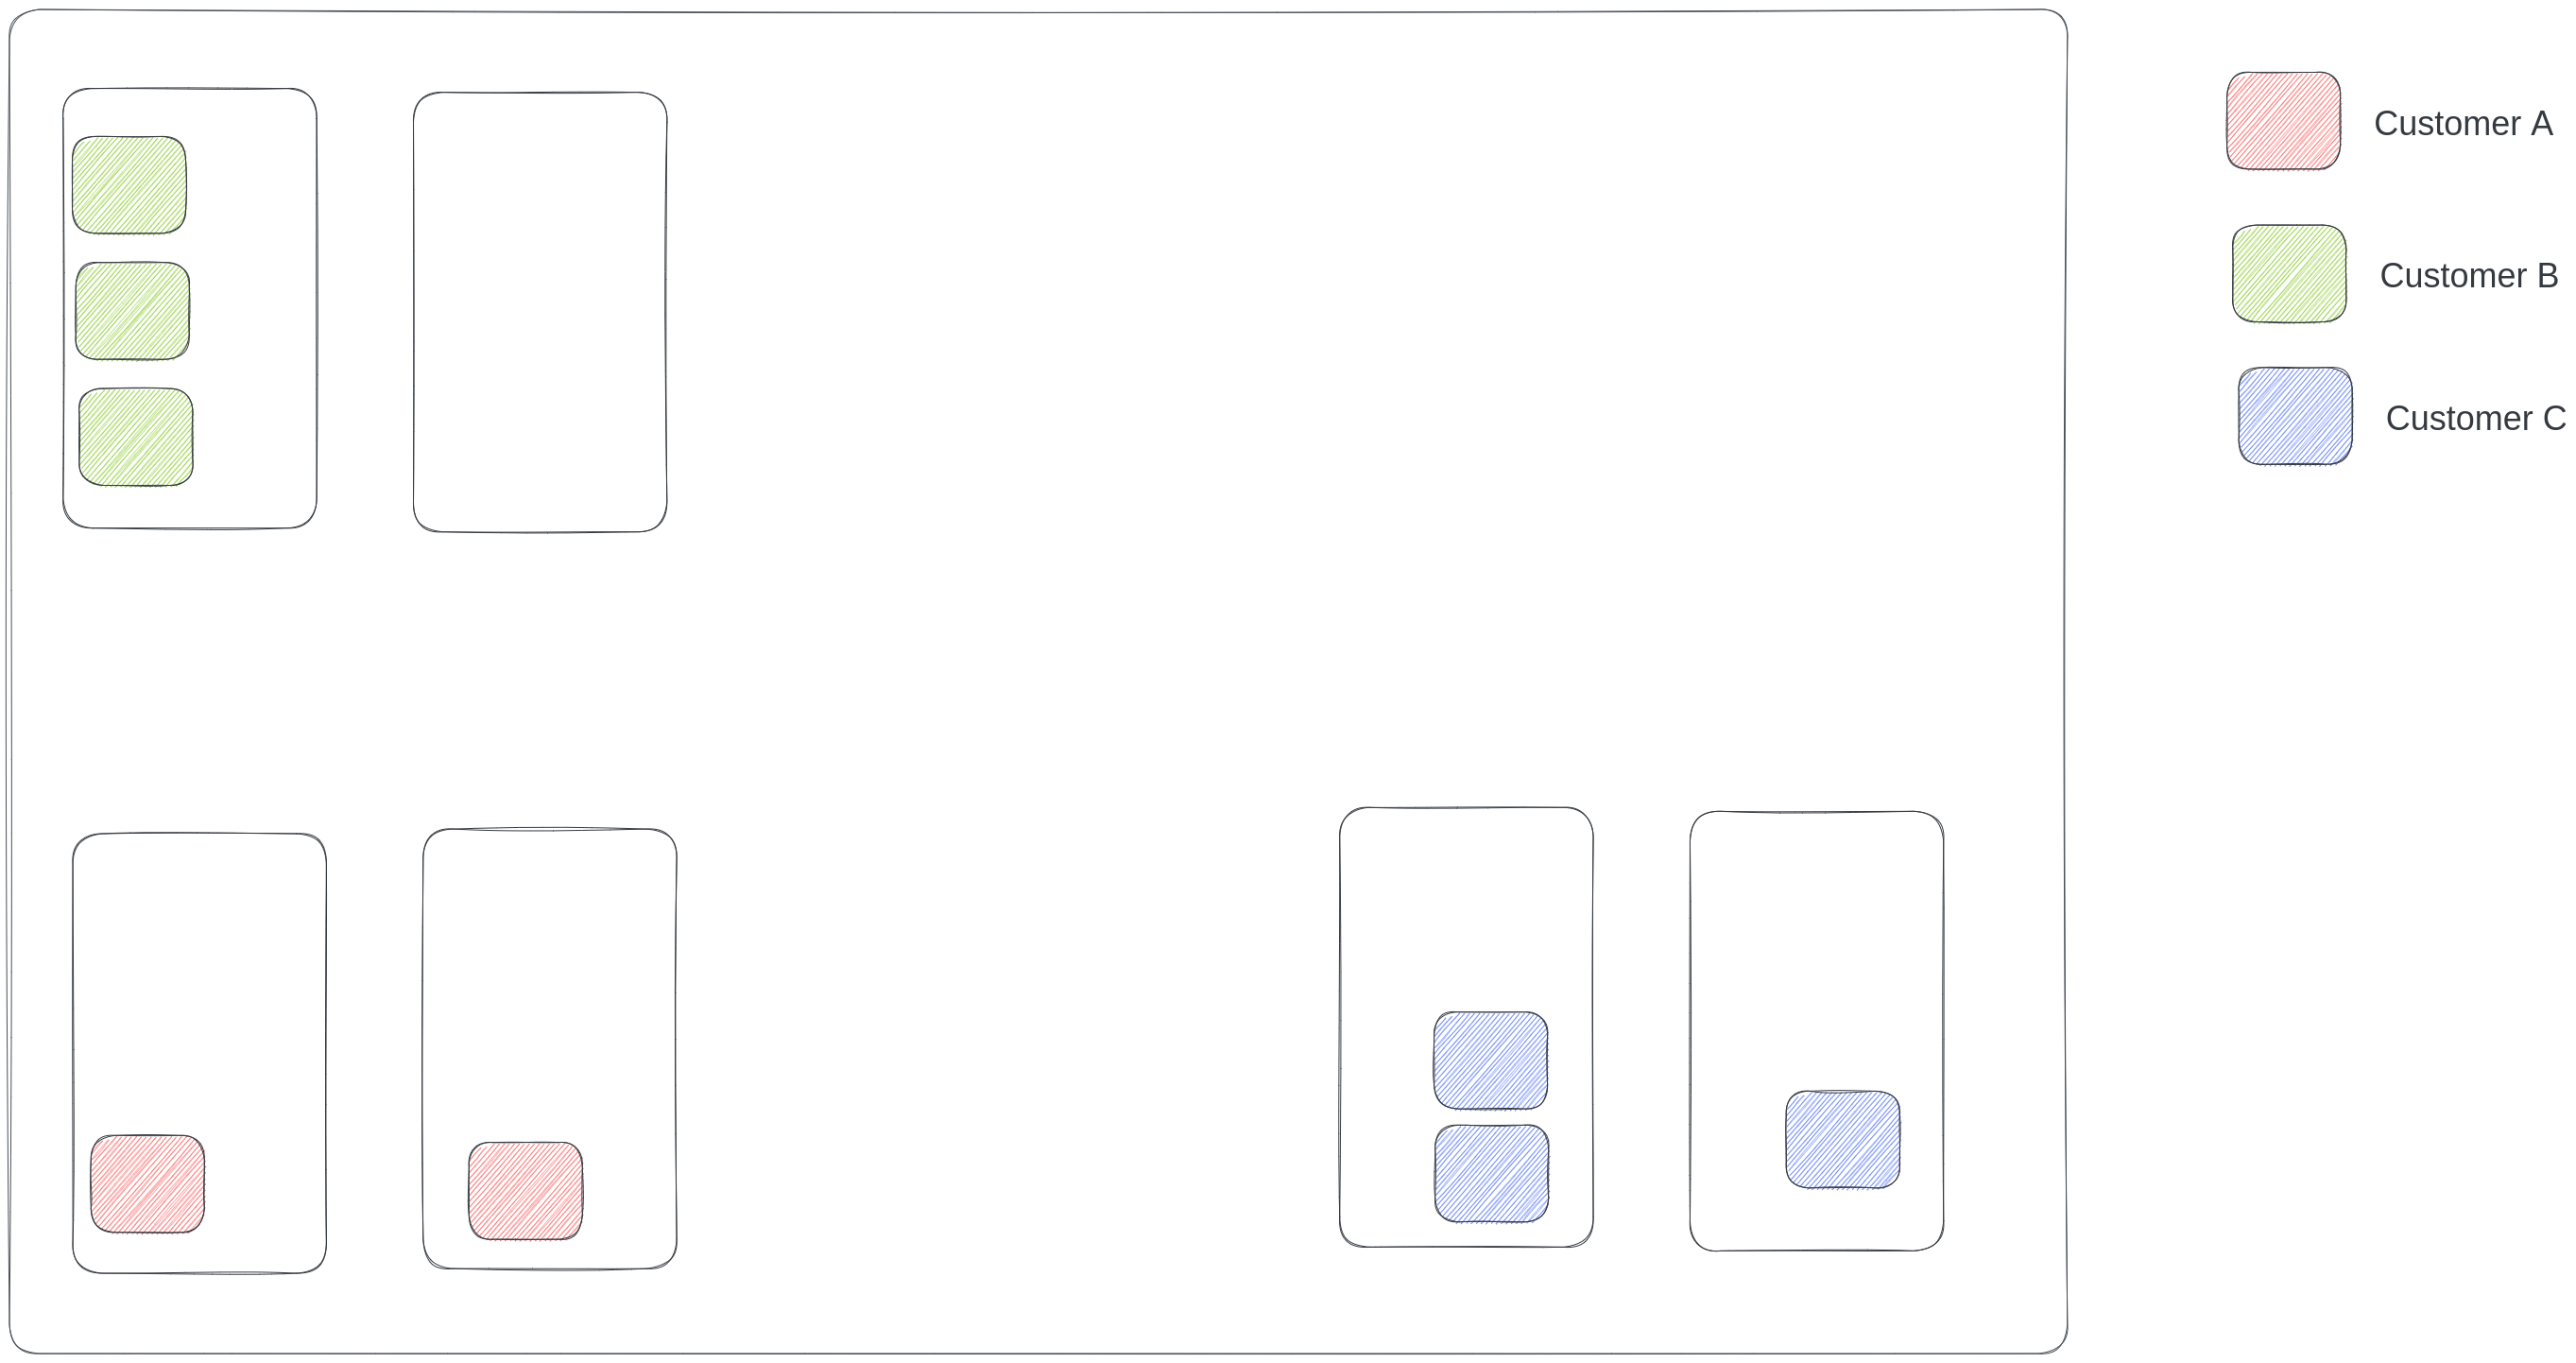
The answer was to use Containers. Container is basically a process / group of processes run isolated from other processes, with its own isolated file system. No there is no overhead of OS etc. This is achieved through to CGroups and namespaces features provided by Linux Kernel. Docker is one such implementation of Container from Google.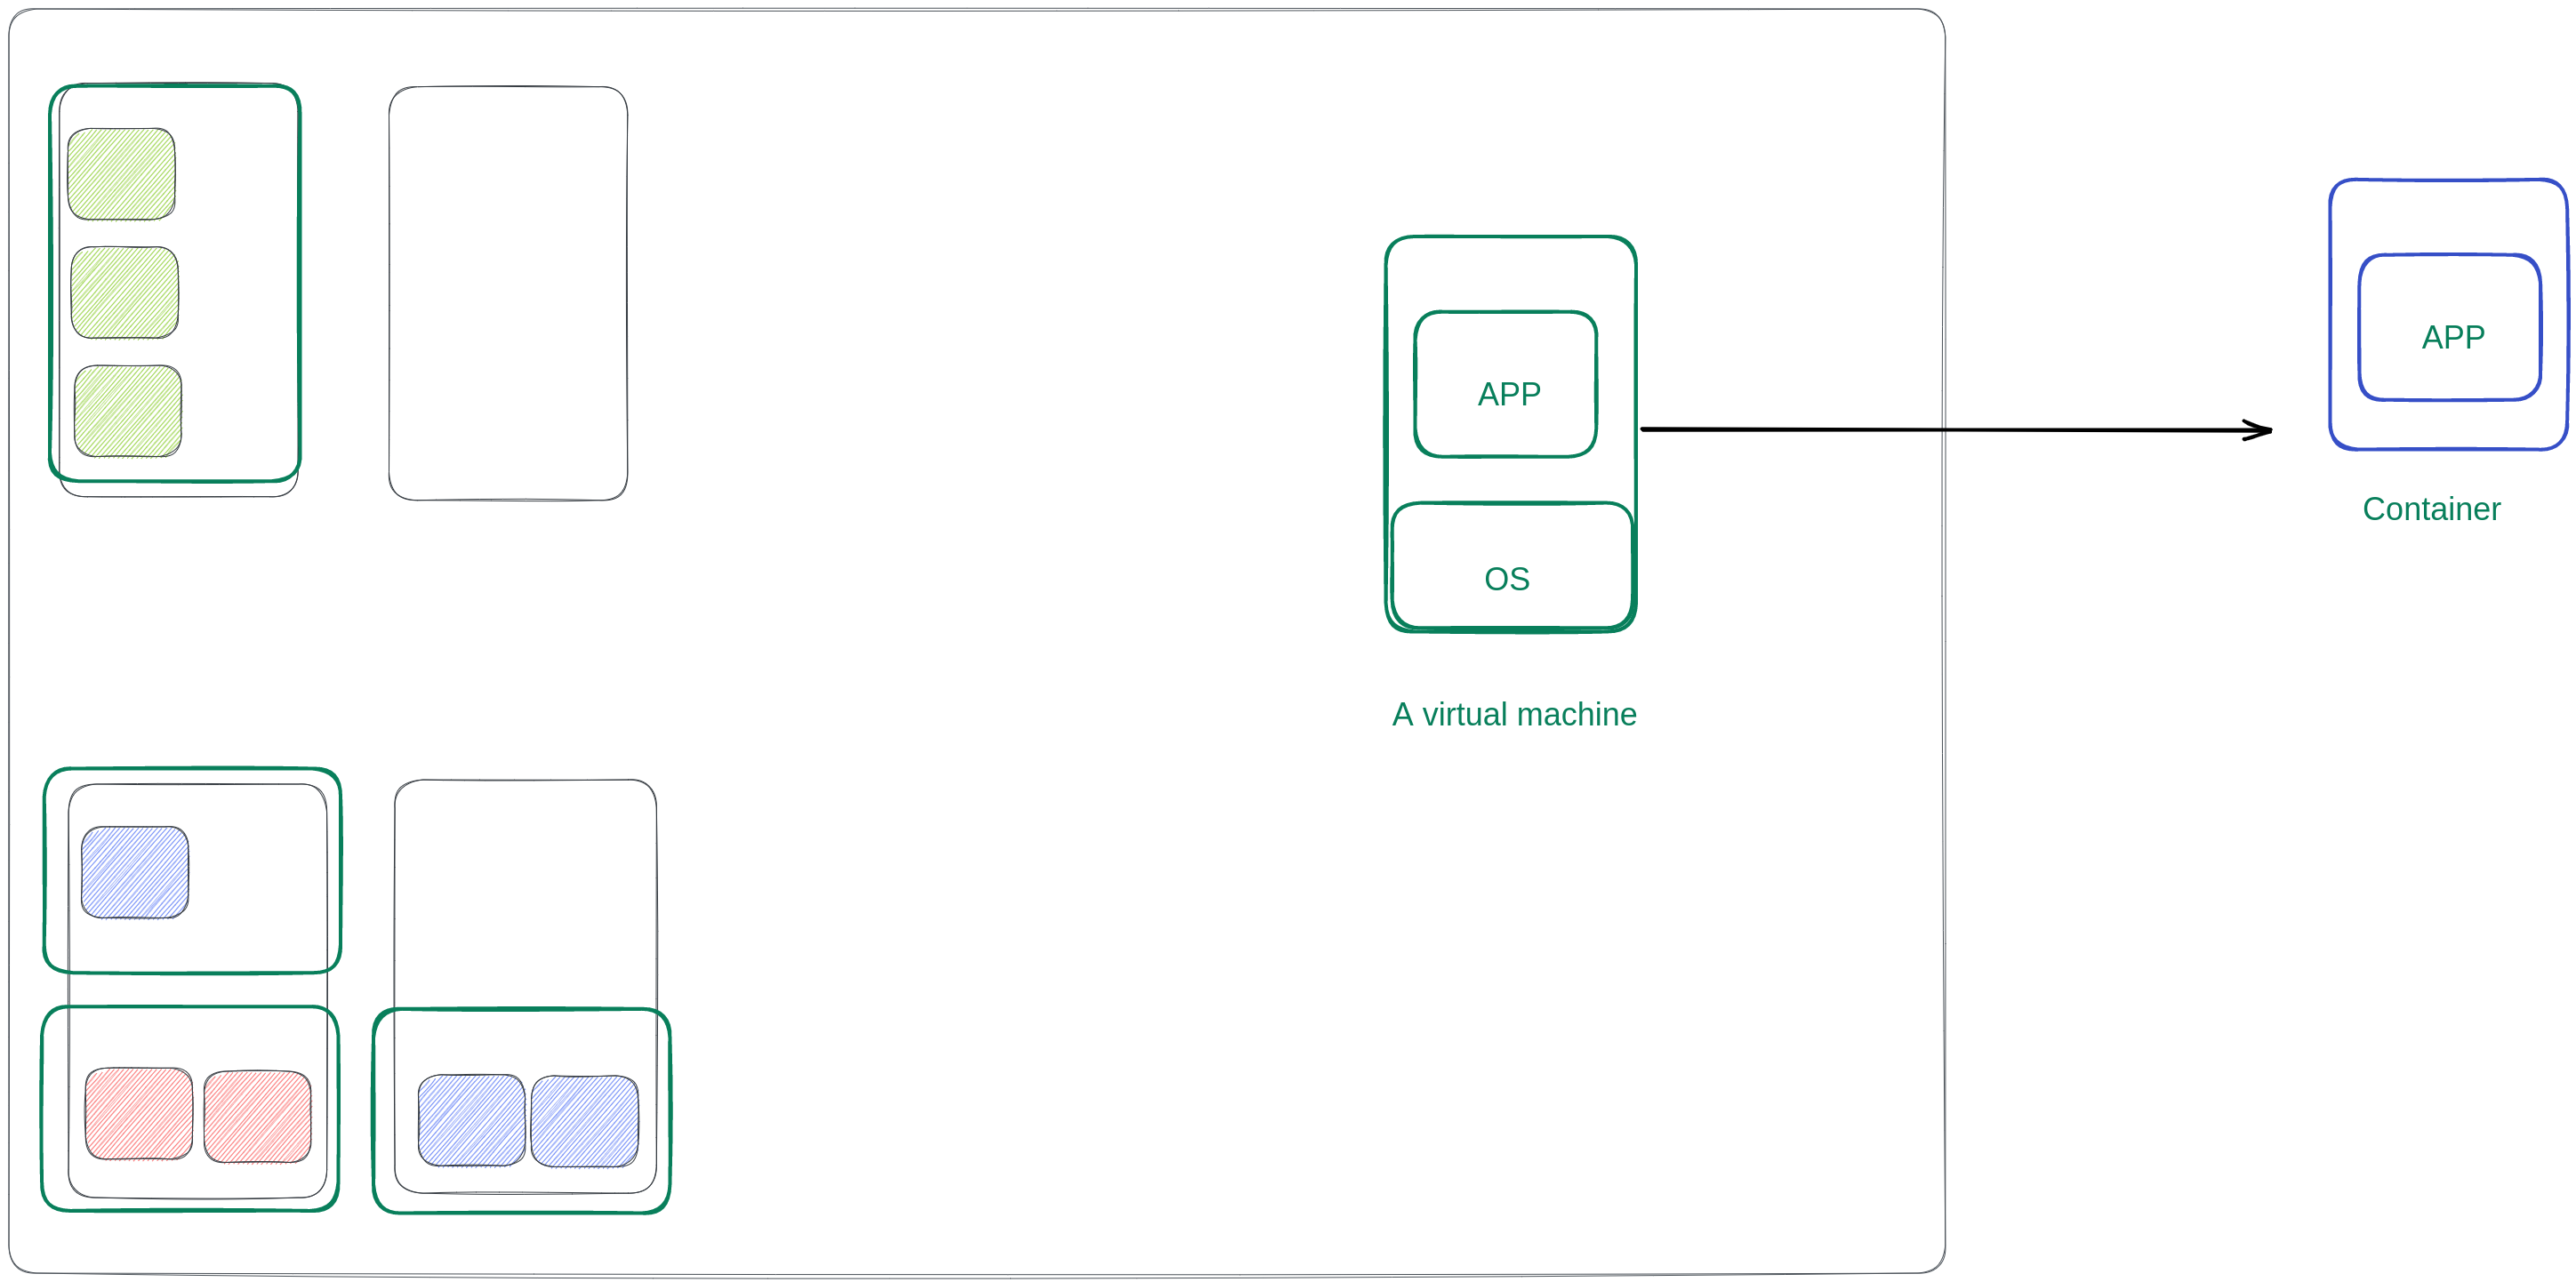
- Application distribution : One another important problem is distributing apps, all the headache involved keeping up the dependencies in the host environment where the service get deployed. Where the developer has version of Library say magic-0.1.5 and production environment has magic-0.1.4, application starts misbehaving and everybody starts pulling their hairs with no clue!!!. So Docker solves this problem by shipping the application with all the dependencies, that’s cool so no more worries about dependency version conflicts.
Our example app 🔗
We’ll create a simple web application in Go for demonstration in this article, which will echo your name back with current timestamp, very simple.
package main

import (
	"fmt"
	"net/http"
	"time"
)

func handler(w http.ResponseWriter, r *http.Request) {
	name := r.URL.Path[1:]
	if name == "" {
		name = "World"
	}

	fmt.Fprintf(w, "<html><body><h1>Hello %s</h1><h3>%s</h3></body></html>", name, time.Now().Format("2006-01-02 15:04:05"))
}

func main() {
	http.HandleFunc("/", handler)
	http.ListenAndServe(":8080", nil)
}
Compile our app, create the binaries which will be copied to Docker.
go build -o hello
Install Docker 🔗
Follow the steps from here install Docker for your machine, https://docs.docker.com/engine/install/
The 🔗
Now it gets into a interactive prompt where you see the stdin & stdout bound to your terminal. But most times we want to run them in background. To run it as background use the below version
$ docker run -d -p 8080:8080 hello
Nothing showed up! Yeah! To see currently running containers use
$ docker ps
hope this article gave pointer to you for getting started.Dockerfile To deploy an application as container, we have to first create container image basically which should hold all the dependencies, binaries and resources bundled in them. Docker has notion of specifying what goes to into this container image, by defining a Dockerfile. Let’s get started by creating one. Create a file name Dockerfile which would have the following content,
FROM ubuntu:latest
RUN apt update && apt-get install -y ca-certificates
WORKDIR /app
COPY hello hello
CMD ["/app/hello"]
Now to build this, we have to run
docker build -t hello:latest .
-t says how my container image has to be named or tagged hello:latest. hello says container name, latest is the tag or version. . at the end specifies, we have to look for Dockerfile in the current directory.
To look up all image in our machine we can run docker images
Lets go by each line to understand what it does,
FROM ubuntu:latest
It says that for our container base image to use is ubuntu:latest , so docker daemon will pull this image from dockerhub https://hub.docker.com/ , if not locally available.
RUN apt update && apt-get install -y ca-certificates
this says when we build this container image, run the cmd inside the base image and whatever changes happened will be added as layer to the base
image. Here, ca-certificates to will be downloaded and added to base image.
WORKDIR /app
this says that whatever operations happens after setting this will take /app inside the container image as relative address’s parent. For example next COPY hello hello instruction, copies hello binary from our current directory to /app/hello.
And finally CMD ["/app/hello"] says that this will be starting executable when the container starts. For most scenarios there will be a single process per container.
Run Docker 🔗
Now lets run our containerized hello app, by using below command
$ docker run -it --rm -p 8080:8080 hello
Let’s break down the above command to see what it does.
- The
docker runcommand is used to run a container from an image, - The
-itflag starts the container in an interactive mode (tie it to the current shell), - The
--rmflag cleans out the container after it shuts down, - The
--name mathapp-instancenames the containermathapp-instance, - The
-p 8010:8010flag allows the container to be accessed at port8010, - The
hellopart specifies the image name to use in the container.
Now it gets into a interactive prompt where you see the stdin & stdout bound to your terminal. But most times we want to run them in background. To run it as background use the below version
$ docker run -d -p 8080:8080 hello
Nothing showed up! Yeah! To see currently running containers use
$ docker ps
hope this article gave enough pointers to get you started.